Acrylic nail designs have become a defining trend in modern beauty, offering limitless creativity, durability, and style versatility. Whether you love bold statements or minimalist elegance, acrylic nails give you the freedom to express your personality through stunning shapes, colors, and finishes.
From coffin nails to sleek long nail designs, mastering the right techniques and choices can elevate your manicure from basic to salon-worthy. This guide is based on proven insights behind the most viral acrylic nails ideas, helping you achieve flawless results every time.
Why Acrylic Nail Designs Are So Popular Discover what makes acrylic nails a go-to choice for durability, customization, and high-impact beauty looks.
Acrylic nail designs stand out because they combine strength with artistic flexibility. Unlike natural nails, acrylics allow you to experiment with dramatic lengths and shapes without compromising structure.
They are also highly customizable, making them perfect for everything from subtle everyday styles to bold, glamorous finishes. This versatility explains why long nail designs continue to dominate beauty trends worldwide.
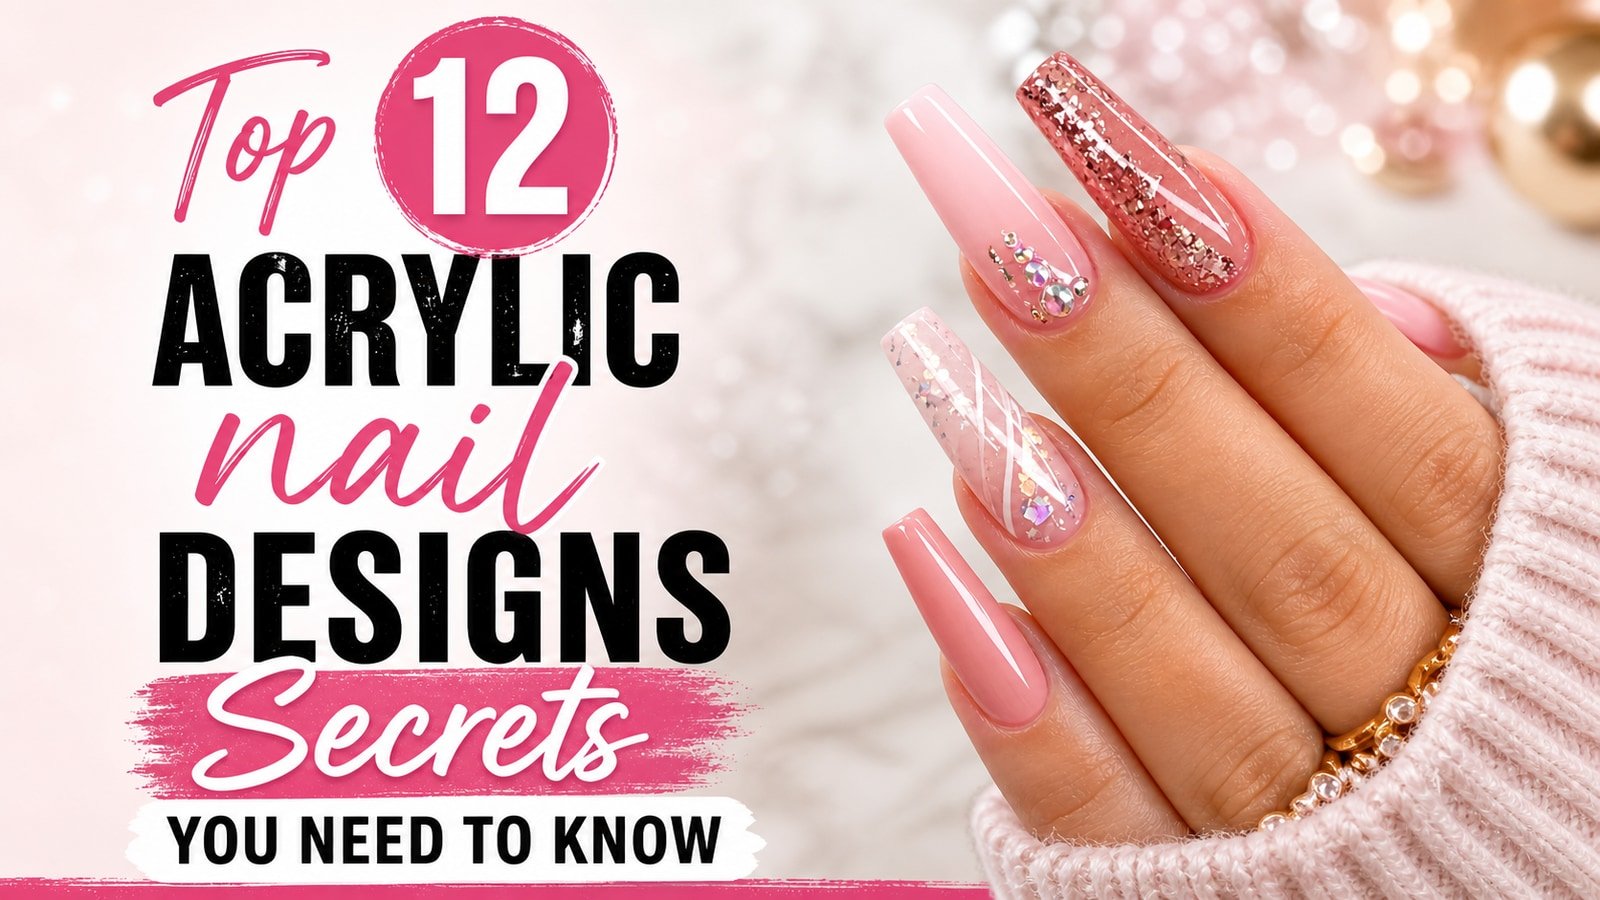
Choose the Right Shape for Your Style The right nail shape enhances hand appearance and sets the foundation for any acrylic design.
Selecting the correct shape is essential. Popular options like coffin nails, almond, and square shapes each create a different visual effect. Coffin nails, in particular, are known for their sleek, elongated silhouette that flatters most hand types.
Your shape choice influences how designs sit on the nail, making it a critical first step in achieving a polished and cohesive look.
Why Quality Products Matter in Acrylic Nails Using high-quality materials ensures longer-lasting results and protects the health of your natural nails.
Not all acrylic systems are created equal. Investing in high-quality powders, liquids, and tools leads to smoother application and better durability.
Low-quality products can cause lifting, cracking, or damage, which compromises both appearance and nail health. Professional-grade materials help maintain that flawless finish longer.
Design with Confidence and Creativity Explore how bold choices and personal style elevate acrylic nail designs into standout beauty statements.
Acrylic nail designs are all about self-expression. Whether you prefer minimal nude tones or intricate glitter accents, confidence plays a key role in pulling off any look.
Long nail designs provide a larger canvas, allowing for detailed art, rhinestones, or ombré finishes. The key is balancing creativity with a design that complements your overall style.
Step-by-Step Guide to Perfect Acrylic Nail Designs Follow these essential steps to achieve salon-quality acrylic nails with long-lasting, flawless results.
- Prep natural nails properly
Start by cleaning, shaping, and gently buffing your natural nails to remove oils and create a smooth base that helps acrylic adhere securely and last longer without lifting.
- Push back cuticles gently
Carefully push back your cuticles to expose the full nail plate, ensuring a cleaner application area and preventing premature lifting or uneven acrylic placement.
- Apply nail forms or tips
Choose between nail forms or pre-shaped tips depending on your desired length and style, especially if you're aiming for dramatic coffin nails or bold long nail designs.
- Mix acrylic to correct ratio
Achieve a balanced bead by combining liquid monomer and powder polymer correctly, ensuring the mixture is not too wet or dry for smooth and controlled application.
- Sculpt the nail shape
Shape the acrylic carefully while it's still pliable, defining your chosen structure such as coffin nails, ensuring symmetry and a clean, professional appearance.
- Let acrylic fully cure
Allow the acrylic to harden completely before filing or shaping further, as working too early can cause dents, uneven surfaces, or structural weakness.
- File and refine edges
Use a nail file to perfect the shape, smooth the surface, and sharpen edges, creating a polished base ready for your chosen acrylic nail designs.
- Apply base color evenly
Choose a base color that complements your design and apply it evenly, ensuring full coverage without streaks for a clean and professional-looking foundation.
- Add creative nail art
Incorporate design elements like glitter, rhinestones, or ombré effects to elevate your acrylic nails ideas and make your manicure stand out.
- Seal with top coat
Finish with a high-quality top coat to add shine, protect the design, and extend the life of your acrylic nails while preventing chipping.
- Hydrate cuticles and hands
Apply cuticle oil and hand cream to maintain hydration, improve nail appearance, and keep the surrounding skin healthy and smooth.
Comments
Thoughtful discussion — moderated before publishing.
Start the thread — your note appears after a quick review.